Beauty/Body Recipes, Tips & Tricks, Uncategorized

Homemade Beautyberry Mosquito Repellant


I recently saw a meme that said “Fall in Florida – It’s like summer but with pumpkins” and it’s SO true lol. Unfortunately, this means that we are still dealing with those pesky mosquitoes. My youngest kiddo must be extra sweet to them because they always go after her more than the rest of us. But since trying this Beautyberry repellant recipe she has not had ONE bite, I am amazed!

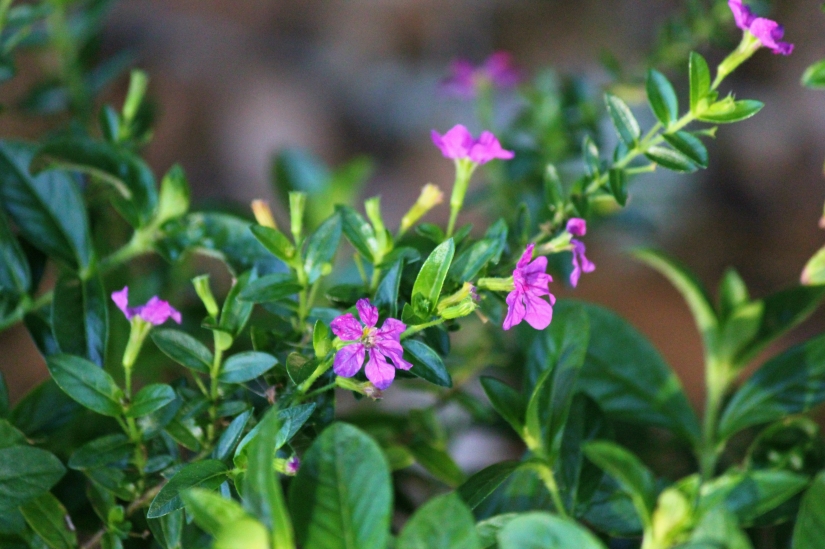
The leaves of the beautyberry plant are said to be at least as effective as Deet for repelling mosquitoes and even ticks. It will need to be reapplied every 2-3 hours, please test a small area of your skin first to make sure you will not have a reaction before spraying it over your body. This plant is found in the SE of the USA, there are beautyberries all over NE Florida where we live. If you don’t have this plant or can’t find any nearby, you can order some here: Beautyberry Plant – One Gallon Pot. They grow well in USDA zones 7-11 and they can be easily propagated from cuttings, so if you order one plant you can easily make more! I have a row of them along one of my fences now, you can see my Instagram post on that HERE if you’d like. You can also use the berries to make jelly, add to bread or muffins, etc. You can find more information about growing them HERE.

To make the repellant you will need lots of leaves, I collected a large bowl full. I didn’t weigh or measure in any way, but it was at least a few handfuls. I actually harvested entire branches, removed the leaves, cut into pieces that had a few nodes each, and stuck them in moist potting soil to grow more plants. After only a few days they already have new growth.

Beautyberry Mosquito Repellant Recipe:

Wash the beautyberry leaves you gathered and cut them into strips.

Fill any size mason jar with the leaf strips.

Pour boiling water over leaf strips and fill jar.

Let sit overnight, then strain.

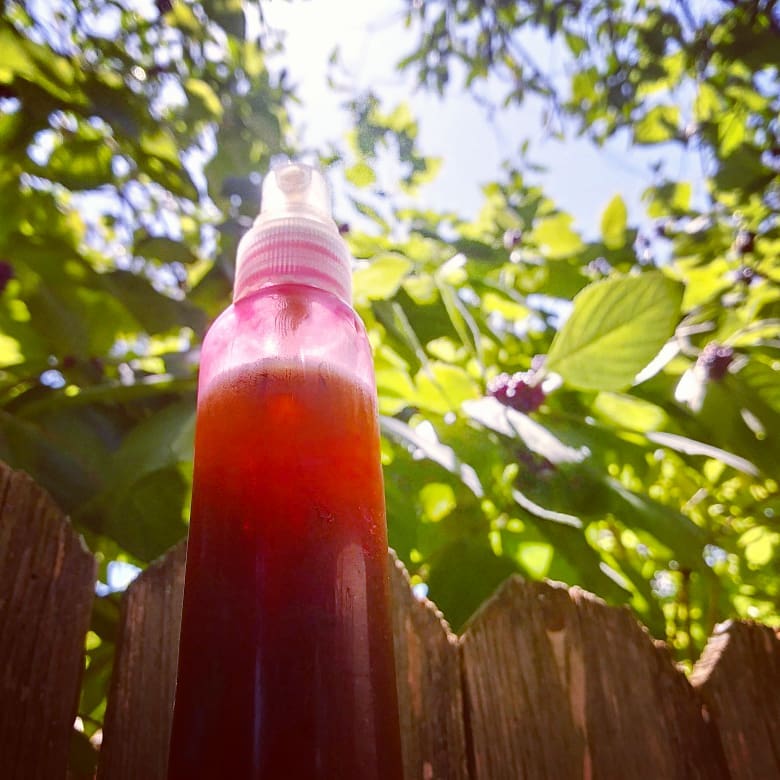
Pour into spray bottle and store in fridge to extend shelf life.

*Warning* – Do NOT drink. Please label properly and keep out of the reach of children.

Enjoy!

❤ Ashley

Food Recipes

Steak and Cheese on Low Carb Pita


I posted a picture on Instagram & Facebook and a lovely friend asked me for the recipe, I thought it would make a great post!

This is one of my husband’s favorite meals, and I have to say I really enjoy it as well. It’s super quick and easy and better than a lot of steak and cheese subs I’ve had when getting take out. Here we go!

Ingredients:

1 onion, chopped

1 bell pepper, chopped

1 pound thin sliced roast beef, cut into small strips

Montreal Steak Seasoning

2 cloves garlic, minced

Sliced provolone cheese

Butter or olive oil for cooking

Mayo

Low carb pita bread (This is the kind I buy)

Optional toppings: Sliced tomato, lettuce, pickles, olives, etc.

Directions:

I use a well-seasoned cast iron skillet on medium heat. Start by adding a pat of butter to your skillet. Add your chopped onions and bell pepper. Cook until they are soft and just starting to brown. Remove from pan, add another pat of butter and the roast beef. Season with Montreal Steak Seasoning to taste. Cook until brown, add minced garlic and cook for an additional minute. Add pepper and onion back to the pan and stir into the meat. Turn off the heat and add the sliced provolone as a top layer on top of the mixture. Once the provolone is melted, remove from heat.

Serve on the low carb pita bread with mayo, and whatever toppings you like, enjoy!!

❤ Ashley

Crafts/Fun Recipes, Tips & Tricks

Homemade Faux Pewter Pedestal Dish


Homemade Faux Pewter Pedestal Dish ~ Ashley's Homemade Adventures
Homemade Faux Pewter Pedestal Dish ~ Ashley’s Homemade Adventures

I absolutely LOVE the DIY faux pewter pedestal bowl tutorial at Morena’s corner so I had to try making one myself. I looked on Amazon to find similar items to see how much they cost and you can definitely get the look at a fraction of the price with this method. Here are some examples: Mermaid Pewter Bowl  , Decorative Pewter Bowl on Pedestal and Pewter Octopus on Glass Bowl (Just use this method on the figure before attaching it to the glass). Just think of all the possibilities! 

I picked this cute little angel to stand in the middle of mine. The angel, dish, and pedestal were all from Dollar Tree! I love how it turned out, what do you think? 

For the full tutorial please visit Morena’s corner HERE. 

It makes a perfect jewelry holder! Homemade faux pewter pedestal dish ~ Ashley's Homemade Adventures
It makes a perfect jewelry holder! Homemade faux pewter pedestal dish ~ Ashley’s Homemade Adventures

❤ Ashley

Beauty/Body Recipes, Tips & Tricks

Homemade Makeup Primer (and happy Spring!)


Homemade Makeup Primer ~ Ashley's Homemade Adventures

This homemade makeup primer has only 2 ingredients, it couldn’t be more simple and it’s so cheap to make! I have been using it for a few weeks now and I am loving it.

This is going to sound really weird but I was using this anti-chaffing gel as a primer for years. I can’t remember where I saw it but someone had suggested it as a cheaper alternative to this Smashbox primer. It actually works great, although I can’t say if it compares to the Smashbox primer since I never tried that. Still, I wanted to try to make something that has better ingredients and to save even more money.

I have seen other primer recipes that say to mix your foundation with moisturizer but I wanted to try to make something similar to the gel I had been using for a long time. I already had a small bottle of aloe gel I picked up at the dollar store. We live in Florida and I burn easily so it’s a must have! I grabbed that and went to the kitchen to experiment, this is what I ended up with.

Homemade Makeup Primer ~ Ashley's Homemade Adventures

Homemade Makeup Primer:

1 Tablespoon Aloe Gel

1 Teaspoon Cornstarch

Simply mix together until combined, and store covered so it won’t dry out. Apply to clean skin and let dry before applying foundation.

I wanted to use arrowroot powder but I’m currently out, more people will probably have cornstarch in their kitchen anyways. If you try the arrowroot powder version please let me know how it turns out in the comments. It has always worked perfectly in place of cornstarch in other things I have made. Either way, this costs only pennies to make!

I think this is a great amount to start with to see if you like it. If you want to make a bigger batch then simply increase the aloe gel to 1/4 cup and the arrowroot powder to 1 tablespoon.

I hope you enjoy this and that it will help save you money! If you try it, please let me know how you like it. If you have any ideas on improving it, I would love to hear those also.

Since it’s finally spring, I just wanted to share some pictures with you guys! This is probably my favorite time of year here in NE Florida. The weather is gorgeous! (as I am writing this, it’s in the 70’s with blue skies – perfect!) I already have some peas in the garden and some other baby plants in pots (Tomato, basil, melon, etc.) I absolutely love working in the garden, even if I pay for it later lol. We have lots of wildflowers blooming and it’s just a beautiful time of year with the new growth. I hope these will bring a smile to your face, especially if you are still dealing with winter weather where you live.

❤ Ashley

Pets/Animals, Tips & Tricks

Homemade Hummingbird Nectar Recipe vs. Store Bought


In this post I am going to compare homemade and store bought hummingbird nectar, go over the dangers of red food dye, and share a super easy recipe to make your own hummingbird nectar. Please read all the way to the end, I share some important information and tips.

Homemade Hummingbird Nectar ~ Ashley's Homemade Adventures
Homemade Hummingbird Nectar ~ Ashley’s Homemade Adventures

Our feathered friends will be making their way north very soon! According to Southeastern Avian Research, the Ruby Throated Hummingbirds will be arriving in my area any day now 😀 If you would like to see the migration map you can find it on their Facebook page.

So let’s start with store bought nectar, most of the nectar you see in the stores are red. However, the red dye is not needed! The birds will still come without it, I have seen it myself many times. According to Bird Watchers Digest, Red #40 is a known carcinogenic and mutagenic. Please see their full article on the topic HERE (link will open in new tab) it’s very interesting and good information to know. Store bought nectar will last a little longer in the feeder before you need to replace it and clean the feeder, but you will have to replace the nectar and clean the feeders fairly often anyways. Which leads me to this:

You do NOT want mold to start forming, this could make the birds very sick. You will want to change the nectar out frequently, you may have to do it daily or every other day if you live somewhere very hot (like I do!). If the nectar starts to look cloudy, it definitely needs to be changed. I like to clean my feeders out with an all natural soap and vinegar, it’s important to make sure to rinse very well. When looking for a feeder, I like to make sure that a bottle brush will be able to fit inside for cleaning as some have very narrow openings.

Now for homemade nectar, it’s VERY cheap, and VERY easy! You can make it fresh in small batches as needed if you’d like, or you can make a large batch and store the extra in the fridge for up to a week. This will need to be replaced more often than store bought, as it contains no preservatives. I have seen conflicting advice on whether or not you need to boil the water, but I like to do it just to be safe. You also want to make sure you ONLY use white cane sugar. Please never use honey or any artificial sweeteners, or RAW sugar because it is higher in iron which can be bad for the birds in large amounts. You want plain ‘ole white sugar.

Homemade Hummingbird Nectar:

  • 2 cups water
  • 1/2 cup white sugar

Heat water to boiling, remove from heat, and stir in sugar until dissolved. Cool before pouring into hummingbird feeder. Store extra covered in fridge for up to one week. Replace with fresh nectar often, especially in hot weather.

This picture is from 4 years ago when we lived in an apartment complex in a very busy area of town. I used this same recipe and it attracted multiple hummingbirds to our balcony!

A few other tips:

  • Avoid using insecticides/pesticides in your yard, hummingbirds also eat bugs!
  • If you have many birds battling over the feeder, consider hanging multiple feeders, even in multiple locations around the yard.
  • Plant flowers and fruit trees to help attract hummingbirds.
  • If you see a praying mantis on or near your feeder, please gentle relocate it to another spot. Praying Mantis can catch and eat small hummingbirds.
  • Find beautiful hummingbird feeders here.

Enjoy watching your new feathered friends!

❤ Ashley

Food Recipes

The BEST Homemade Ranch


The Best Homemade Ranch ~ Ashley's Homemade Adventures

I finally found the one… The absolute BEST homemade ranch recipe! I have tried so many over the years. Some were decent, but just not exactly what I was looking for. I took what I liked from a few different recipes and combined them. This recipe is so good and SO easy (which makes it even better). Everyone loves it and I am always asked for the recipe. It’s also happens to be Keto friendly!

When you make this it will be a little thick, which is perfect as a veggie dip. To use it as salad dressing I usually thin it down more, just add more cream until it’s the consistency you want. You can use buttermilk in place of heavy cream if you’d like, or half of each is good too! I recommend making it at least a few hours ahead of time, overnight is even better.

This makes quite a bit of ranch which is great for a family or if you are making it to bring to a party, but if you are just making it for yourself you will probably want to cut the recipe in half.

Ashley’s Homemade Ranch: 

1 cup (REAL) mayonnaise

1/2 cup sour cream

1/2 cup heavy cream

1/4 cup dried parsley flakes

1 teaspoon garlic powder

1 teaspoon onion powder

1 teaspoon dried chives

1 teaspoon dried dill

1/2 teaspoon Italian seasoning

1/2 teaspoon salt

1/2 teaspoon pepper

Add all ingredients to a large bowl and stir until combined. Chill for at least a few hours.

I hope you and your family will enjoy this as much as we do! If you try it, please come back to let me know what you think in the comments below and share with your friends.

❤ Ashley

The Best Homemade Ranch ~ Ashley’s Homemade Adventures

The ramekin pictured is from the Pioneer Woman line, I just love her stuff! You can get your own here: The Pioneer Woman Ramekins  

More amazing Pioneer Woman products, so pretty!

#Ranch #HomemadeRanch #RanchDip #RanchDressing #RanchRecipe #RanchDressingRecipe #RanchDipRecipe #HomemadeRanchRecipe #KetoRanch #KetoRanchRecipe #HomemadeKetoRanch #KetoDip #KetoDressing #HomemadeKetoDressing #KetoRecipes #AshleysHomemadeAdventures

Uncategorized

Back to Blogging!


Hey everyone!

Long time no see 😀 My life has been pretty much consumed with health issues these past few years and it has been hard to focus on much else besides that and my family. I didn’t want to stop working on my blog but I just didn’t have the energy at all. Even though I have been diagnosed with yet another disease, (one that is very painful and actually pretty rare) with the help of CBD oil I am feeling more like my old self! I’m ready to tackle this again.


There have been many changes, we are a homeschooling family now and my little helpers are getting so big!! We bought our first house, put in a garden, and have been working on the landscaping. I have learned a lot about gardening and plants and would love to share some of that info on here as well. We also have some new furry and feathered family members 😀 Life has been very hard in one way, but very good in others. I am trying hard to stay positive and still feel very, very blessed.

I’m so excited to get back into the swing of things, and I already have some ideas and recipes I can’t wait to share. It’s good to be back! Keep an eye out for new posts coming soon.

Love,

Ash

me3
Zazzle Community Member


Gifts

Uncategorized

Another Update – March 2016


Hello Everyone!

I hope 2016 is treating you all well. Spring is almost officially here which is very exciting! I wish this post was a recipe, but it will have to be another update.

Shortly after my last post, my health started declining again… very rapidly. I had some pain in my feet for some time but it became almost unbearable. I also started getting horrible joint pain all throughout my body, swelling, and the crushing fatigue is back. I do not think this is related to the parathyroid disease that I went through. I have a family history of auto-immune diseases RA and MS… and I am very afraid that all the stress I have been through may have triggered something in my body.

I made an appointment with my doctor but at the last minute I was told she called out sick… so I had to see another lady I had never met before. I was very unhappy when I left. She kept telling me things like “You are too young to feel this way” (To which I replied: “Yea well I was also too young for parathyroid disease but I just went through that!”) and just tried to blow me off. I really think she thought I was just a pill seeker by the way she was treating me. But the funny thing is that I did not even ask for anything for the pain. (Because I did not want to be labeled that way!)

So I am currently in limbo… no diagnosis on what is wrong with me, but suffering tremendously. Nothing for the pain, except tylenol which barely touches it. Just making it through the day has become difficult again. I actually had to break down and buy a cane last week, because I am sick of limping around. It was hard to do, but has helped. I have an appointment with a specialist in May, I am praying that they will be able to help me. I was just thinking yesterday that I can not remember the last time I baked something, or went outside to take pictures, or took my kids to do something fun. I am having a hard time with this mentally as well as physically because I will never get this time back. My children will never be this little again. I am very sad that I am missing out and they are not getting the mother they deserve. If anyone has any suggestions for making life easier while raising kids and living with chronic pain & fatigue I would love to hear it, please leave a comment.

I have thought of just shutting this blog down, but surprisingly there are still many views everyday… thank you Pinterest LOL. So I will leave it and hope that one day I can focus on it again. Right now I need to focus on getting better and use what little energy I have for my family.

So after that bad news I must give you all some good news. My husband and I are buying our first house! We have been joking that we feel like “Adultier adults” now 😀 I actually just drove by it again tonight. Maybe that is weird but I don’t care because I am too excited! I am mostly excited about my new lovely kitchen and the yard. The yard is tiny but we plan on turning the entire thing into a garden. I have so many ideas in my head for the new home. I hope my health will cooperate for me to get things done and I hope I can blog about at least some of it as well 😀

Until next time,

❤ Ashley ❤


Uncategorized

Update- Parathyroid Disease


Hello everyone and happy 2016!!

I have great news, I am CURED from parathyroid disease.

Although I was not able to make it to Tampa to see Dr. Norman I was able to make it to Dekalb Medical Center in Decatur, GA to see doctor John Kennedy and he truly changed my life.

Dr. Kennedy was able to located and remove the bad gland (tumor) and cured me! He also discovered during my surgery that the first surgeon had actually removed all of my glands except for the bad one. No wonder I was feeling worse after my first surgery, I had no good gland left at all! Because of this Dr. Kennedy had to transplant a piece of the bad gland back in. He is not sure if I will have this problem again in the future, I am his youngest patient ever with this problem. But For now I am enjoying my life again! I have the peace of knowing that if it does happen again, the bad gland will be easily located next time.

Here is a photo of the tumor removed from my neck. A normal parathyroid gland is the size of a grain of rice.

11863255_10153507744013917_8214733271323018050_n (1)

I can not even begin to describe how different my life is now. I am still recovering from this devastating disease and still having some problems because of it, but I am SO much better than before. I am amazed that I can do normal things now, like vacuum the floor and then steam clean it and still have energy for other things lol. It sounds silly but I was so exhausted all the time before.

A few days after surgery I felt like I was living again and not just existing. I told my husband it was like the lights were coming back on.

If anyone happens to find my blog on the search for information about parathyroid disease and you are hesitant about the surgery please don’t be! Just make sure you find an expert. It is worth it, I promise!

I want to say thank you so much for everyone who was there for me while I was sick, everyone who prayed for me and everyone who shared and/or contributed to the gofundme that my mom set up. You all have no idea how much it means to me.

I have been trying very hard to spread awareness about this disease. Most people have never heard of it and most doctors don’t know enough about it.

If you are searching for more information I definitely recommend starting at http://www.parathyroid.com

I hope to start working on this blog again soon and would like to incorporate more things as well. See you soon!


Love,

Ashley